Ever tried to find a GMU line on a paper map and missed your spot? That happens to a lot of hunters. In this guide you’ll learn how to set up the hunting app GMU map, move around it, plan a hunt, stay safe, and use the most advanced tricks. By the end you’ll be ready to hunt smarter and land more bucks.
Below is the data that backs up our advice. An analysis of 10 leading hunting‑scout apps across 8 sources reveals that only one app, HuntScout, delivers every core mapping feature, while the majority skimp on GMU/WMU coverage despite boasting land‑ownership overlays.
| Name | Land Ownership Overlay | GMU/WMU Coverage | Offline Maps | Season & Regulation Access | Waypoint Sharing | Best For | Source |
|---|---|---|---|---|---|---|---|
| HuntScout (Our Pick) | Yes | Yes | Yes | Yes | share map objects and waypoints with hunting crew across mobile and web | Best overall feature set | huntscout.app |
| onX Hunt | Yes | US only | Yes | Yes | Yes | Best for multi‑source verification | onxmaps.com |
| HuntStand | Yes | US & Canada | Yes | — | Yes | Best for Canada coverage | petersenshunting.com |
| BaseMAP | Yes | West, Central, East, and Canada | Yes | — | Yes | Best for regional coverage breadth | westernhunter.net |
| GoHunt | Yes | US only | Yes | Yes | — | Best for state agency integration | libertysafe.com |
| OnXmaps HUNT | Yes (provides landowner names in many states) | All 50 states (US) | Yes (can work without cellular data) | — | — | Best for detailed landowner names | westernhunter.net |
| HuntWise | Yes | — | — | — | Yes | Best for simple waypoint sharing | petersenshunting.com |
| Earthmate Hunt Edition | No | All 50 states (US) | Yes (large regions can be saved and used in offline mode) | — | — | Best for free offline maps | westernhunter.net |
| MyHunt | — | — | Yes | Yes | — | Best for mobile‑only offline maps | apps.apple.com |
| iHunter | Yes (Alberta, Saskatchewan, Manitoba only) | — | — | Yes | — | Best for Canadian province coverage | ihunterapp.com |
Getting Started: Installing the Hunting App and Accessing the GMU Map
First thing you do is grab the app. Open the App Store or Google Play, search for HuntScout, and tap Install. The download usually finishes in a few minutes on a 4G or Wi‑Fi connection.
And once it’s on your phone, launch it. You’ll see a welcome screen that asks you to create an account. Use an email you check often; you’ll need it for password resets and for syncing data across devices.
But you won’t be left hanging after sign‑up. The app walks you through a quick tutorial that shows where the map button lives, how to turn layers on, and how to save a region for offline use.
Here’s a step‑by‑step rundown:
- Open the app and tap “Create Account”.
- Enter your name, email, and a strong password.
- Confirm your email via the link sent to your inbox.
- Log in and allow the app to use your location (you can deny it now and enable later).
- Tap the “Map” icon at the bottom of the screen.
- Choose your state or province from the drop‑down list.
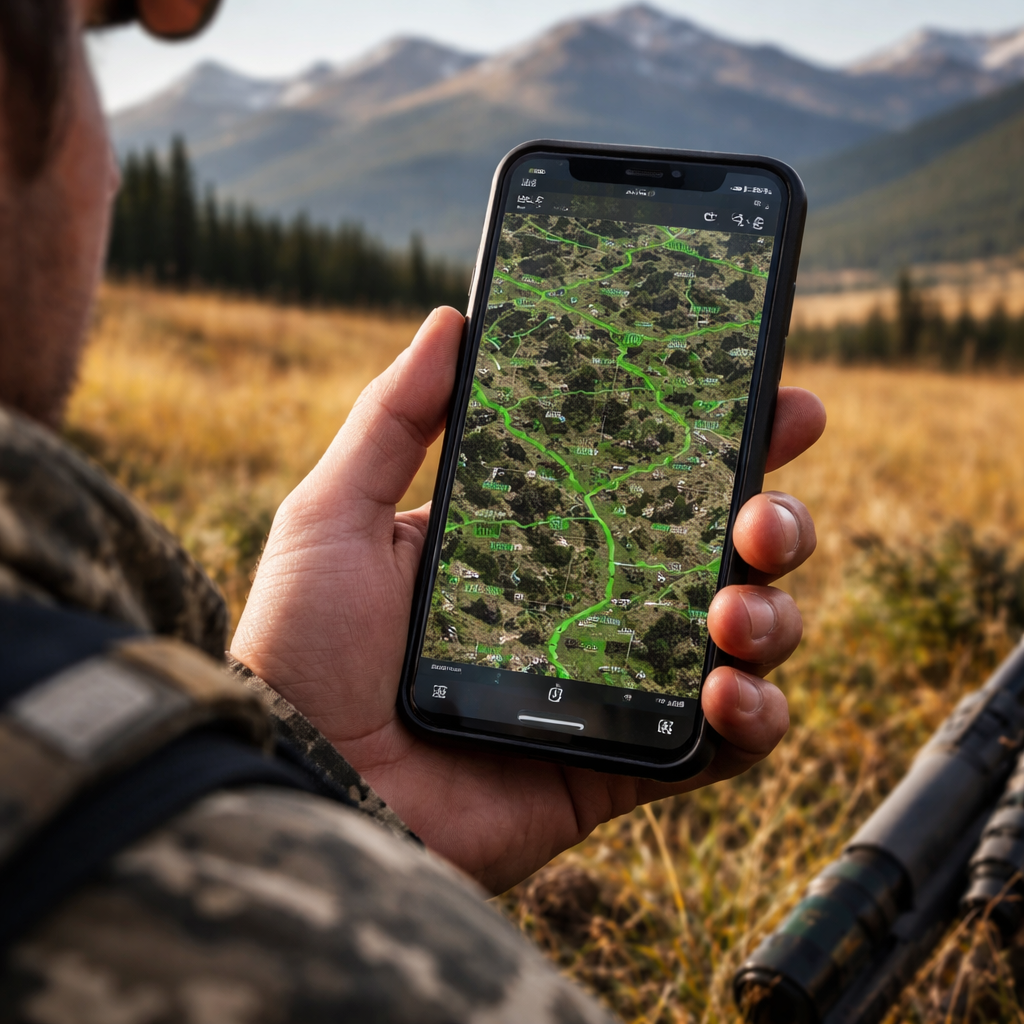
- Tap the “GMU” layer button; the map will draw bright green lines for each unit.
- Zoom in to see the details of your chosen hunt area.
And that’s it. You now have the hunting app GMU map in front of you.
One tip many hunters miss: download the map for the whole county before you head out. That way you can go offline and still see every unit line. To do this, tap the download icon in the upper‑right corner and pick “Full County”. The app will warn you about storage size; a typical county needs 200‑300 MB.
Another tip: set up a profile for each species you hunt. In the “Species” tab you can toggle deer, elk, turkey, etc. When you switch species the GMU layer will automatically highlight the units that are open for that game.
And remember to keep the app updated. New season dates, regulation changes, and map corrections all arrive via updates. Skipping updates can leave you with outdated boundaries.
Finally, a quick sanity check: after you’ve loaded the map, tap any spot on the ground. The app should pop up a box that tells you the GMU number, the season dates, and a link to the official regulation. If you don’t see that, double‑check that the “Regulation” layer is turned on.
Navigating the GMU Map: Key Features and Controls
Now that the map is loaded, let’s look at the controls. At the top you’ll find icons for layers, search, and settings. Below the map you have zoom buttons and a compass that points north.
And the most useful control is the layer button. Tap it to open a list that includes:
- GMU/WMU overlay , bright green lines.
- Land‑ownership overlay , shows private parcels in blue.
- Topographic lines , helps you read elevation.
- Satellite view , real‑world imagery.
But you don’t have to keep all layers on. Turn off what you don’t need to keep the map clear and to save battery.
Here’s a quick cheat sheet for common tasks:
| Task | Steps |
|---|---|
| Find your GMU | Tap the map, read the pop‑up, or use the search bar to type the GMU number. |
| Measure distance | Tap the ruler icon, place the first pin, then drag to the second point. |
| Mark a waypoint | Long‑press a spot, select “Add Waypoint”, give it a name, and save. |
| Switch to offline mode | Open Settings → Offline Maps → Enable. |
And the app even lets you share a waypoint with your crew. Tap a saved waypoint, choose “Share”, and pick the crew members you want to notify. They’ll get a push notification with the exact coordinates.
One real‑world example: a group of three hunters in Montana used the waypoint‑sharing feature to mark a fresh scrape line. Each hunter got the pin on their own phone, drove straight to the spot, and bagged a buck together. Without the shared pin they would have spent hours hunting blind.
Another pro tip: use the search bar to type a road name or a trailhead. The app will jump right to that spot and show the surrounding GMU lines. This saves you time when you’re driving to a remote access point.
Finally, keep an eye on the battery indicator in the top‑right. The map can drain power fast, especially when you run the satellite view. Switch to “Topo” mode to stretch your day.
And if you ever get lost, press the compass button; the app will re‑center on your GPS location.
For a deeper dive on how onX Hunt handles layers, see onX Hunt’s layer guide. It explains why keeping the GMU layer on is a common habit among seasoned hunters.
Also, the onX Hunt tutorial mentions the “Hunt Unit Layer per state and species” as a key feature , a good reference point when you compare how HuntScout does it.
Planning Your Hunt: Using Zones, Landmarks, and GPS Tracking
Planning is where the hunting app GMU map shines. Start by picking a zone that matches your tags and your travel range. The map lets you filter units by species, so you only see the ones you can hunt.
And once you have a list of candidate zones, drill down to landmarks. Tap the satellite view and look for water sources, ridges, and clearings. Those are the places deer love to feed and bed.
Here’s how to turn those observations into a hunt plan:
- Open the GMU overlay and select the target species.
- Zoom into a unit that’s open for that species.
- Switch to satellite view and spot a creek that cuts across the unit.
- Tap the creek at a likely crossing point and add a waypoint named “Creek Crossing”.
- Use the ruler tool to measure how far the crossing is from the nearest road.
- Repeat for at least three other likely spots , a bedding area, a feeding meadow, a travel corridor.
- Save the collection as a “Hunt Plan” folder.
When you’re on the ground, the GPS tracker shows a blue dot that moves with you. Your waypoints stay pinned, so you can see how close you are to each spot.
And if you have a handheld GPS unit, you can export the waypoints as a GPX file. HuntScout lets you import that file later, so you can blend data from multiple sources.
One hunter in Texas used this workflow to scout a 120‑square‑mile area before the season. He marked 12 potential stand sites, drove a day’s worth of roads, and narrowed it down to three that had both water and good cover. On opening day he set up a tree stand at the highest‑rated site and bagged a mature buck.
Another tip: use the “Elevation” overlay to see where the terrain rises. Game often moves up to higher ground in cooler evenings. Mark those high‑points as backup spots.
Finally, remember to tag each waypoint with a note. The note field can hold things like “good for early morning”, “needs a clear shot”, or “watch for wind direction”. Those notes become a personal field guide that you can pull up later.
For more on using topographic maps to plan hunts, see HuntWise’s planning article. It walks through why aerial views and LiDAR can help you pick the right spots.
And the mapthexperience.com site shows how to download Avenza maps for offline use, a useful backup if you ever lose signal.
Avenza map download guide provides step‑by‑step tips for getting high‑resolution GMU maps onto your phone.
And if you want to see a video on map navigation, watch this short demo:
Optimizing Safety: Real‑time Alerts, Weather Overlays, and Emergency Contacts
Safety isn’t an afterthought , it’s built into the hunting app GMU map. The first safety layer is the real‑time alert system. Turn it on in Settings → Alerts. You’ll get push notifications for:
- Severe weather warnings.
- Boundary crossing alerts when you near a private parcel.
- Low battery warnings.
And you can set a custom alert for a specific GMU. For example, if WMU 27 opens at 6 am, set a “Season Open” alert to remind you to head out.
Weather overlays work the same way. Tap the weather icon and choose the hour‑by‑hour forecast. The map will shade areas with rain, snow, or high winds, letting you pick a dry pocket for your stand.
One hunter in Colorado used the rain overlay to avoid a storm that rolled in at 10 am. He moved his blind an hour early, stayed dry, and still got a buck before the storm passed.
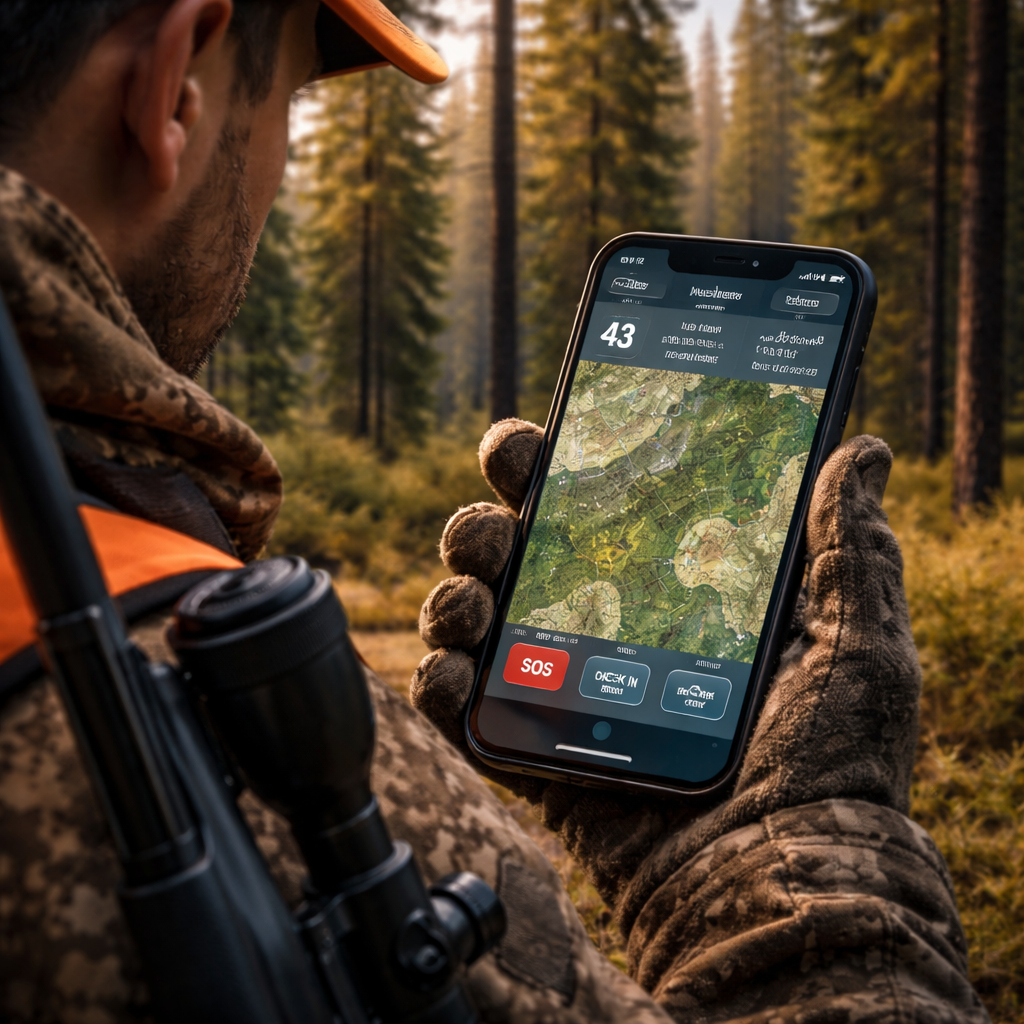
Emergency contacts are stored under Settings → Emergency. Add a phone number for a family member or a local ranger. When you press the SOS button, the app sends your GPS location via SMS to those contacts.
And you can share your live location with your crew. In the “Crew” tab, tap “Live Share” and pick the teammates you want to see your movement in real time. That feature helped a group of four hunters stay within a safe distance of each other in a remote mountain area.
Here’s a quick safety checklist:
- Enable real‑time alerts.
- Turn on weather overlay before you leave.
- Save at least two emergency contacts.
- Test the SOS button while on a Wi‑Fi network.
- Download offline maps for the entire hunting area.
- Charge your phone to 100 % and bring a power bank.
Another tip: set the app to auto‑switch to offline mode when signal drops. That way you won’t lose the map if you go deep into a canyon.
For more on using GPS and map apps for safety, see Dive Bomb Industries safety guide. It explains why live location sharing can be a lifesaver.
And the same site notes that offline maps are a critical safety feature , you should always download the region before you head out.
Advanced Tips: Custom Layers, Data Export, and Syncing with Your Gear
If you’ve mastered the basics, it’s time to unlock the advanced tools. The hunting app GMU map lets you add custom layers. These could be a private landowner’s boundary file, a wildlife camera heat‑map, or a personal “danger zone” layer.
To add a custom layer, go to Settings → Layers → Import. Choose a KML or GPX file from your phone’s storage. The app will overlay it on top of the GMU map, using a distinct colour you can pick.
One pro tip: label each custom layer with a short name like “Owner A” or “Camera 1”. That way you can toggle them off quickly when you need a clean view.
Data export is another power move. After a hunt you can export all your waypoints as a GPX file. Open the “Export” menu, select the folder you want, and tap “Export GPX”. You can then load that file into a desktop GIS program, a Garmin GPS unit, or share it with a hunting club.
Syncing works across phone, tablet, and web. Log into the same account on every device, and any waypoint you add on the phone will appear on the web portal within seconds. This is handy when you want to plan at home on a big screen, then take the plan into the field on a phone.
Here’s a real‑world scenario: a hunter in Wyoming used a custom layer from the BLM that showed seasonal road closures. He imported it, saw that his usual access road would be closed on opening day, and rerouted to a secondary trail. He arrived on time and bagged a trophy elk.
Another example: a group of friends exported their GPS tracks after a hunt, loaded them into Google Earth, and compared the paths they each took. The analysis showed that the hunter who used the ridge line covered 30 % less distance and arrived at the stand earlier.
And for those who love gear integration, you can pair the app with a Bluetooth ear‑bud that reads out your waypoint name when you approach it. Turn on “Audio Alerts” in Settings, and the app will announce “Creek Crossing, 200 ft ahead”.
Finally, remember to back up your data. The app offers cloud sync, but you can also export a full backup file from Settings → Backup → Export All Data. Keep that file on a USB drive or in a cloud folder.
For a deeper look at why custom layers matter, read this Dive Bomb article. It explains how land‑ownership maps and custom layers give you a legal edge.
And the same source notes that syncing across devices prevents data loss if your phone dies. That’s why you should always enable cloud sync before a hunt.
FAQ
How do I download offline maps for the hunting app GMU map?
Open the map screen, tap the download icon, and choose the area you need , county, state, or custom polygon. The app will warn you about storage size. Make sure you have at least 500 MB free for a full county. Once downloaded, turn on offline mode in Settings so the map works without cell service. This step saves you from losing the GMU lines when you’re deep in the woods.
Can I share my waypoints with friends who use a different hunting app?
You can export your waypoints as a GPX or KML file and send the file via email or messenger. Most hunting apps, including onX Hunt and BaseMAP, let you import those formats. After they import, the GMU overlay will line up with the shared points, letting your crew see the same spots even if they’re on a different platform.
What does the real‑time alert do if I cross a private land boundary?
The app monitors your GPS location against the land‑ownership overlay. When you cross a line marked as private, it sends a push notification that says “Private property ahead”. You can then turn around or switch to a public corridor. The alert works offline as long as the offline map includes the ownership layer.
How accurate is the GMU layer on the hunting app GMU map?
HuntScout’s GMU data comes from state wildlife agencies and is updated each season. The app shows the lines to within a few metres, which is accurate enough for most field decisions. If you need sub‑metre precision, pair the app with a dedicated GPS unit that can read the same coordinates.
Is it safe to rely on the weather overlay for storm predictions?
The weather overlay pulls data from reputable services like NOAA. It shows rain, snow, and wind for the next 48 hours. While it’s not a substitute for a full forecast, it gives you a quick visual cue. Always check a detailed forecast before you leave the house, especially for long hunts.
Can I use the hunting app GMU map on a tablet instead of a phone?
Yes. The app works on any iOS or Android device that meets the minimum OS version. A larger screen can make it easier to see the GMU lines and read notes. Just log into the same account on the tablet and sync your data. All waypoints, custom layers, and offline maps will appear.
Conclusion
We’ve walked through every step you need to get the most out of the hunting app GMU map. From installing the app and loading the GMU overlay, to planning routes with landmarks, staying safe with alerts, and using custom layers for advanced tactics, you now have a full toolbox.
Remember the quick verdict: HuntScout tops the pack with all five core features, making it the go‑to choice for serious hunters. Use the tips in this guide, practice the workflows before season start, and you’ll feel confident every time you step into the field.
Ready to try it for yourself? Download HuntScout, set up your first hunt plan, and let the hunting app GMU map do the heavy lifting while you focus on the chase. Happy hunting!