Want a hunting app with harvest log that actually helps you bag more? You’re not alone. We tested five top apps and found the free HuntScout beats most paid rivals on the features that matter most. In this guide you’ll learn how to pick the right app, set up your log, record harvests in real time, crunch the data, and share your intel with the crew.
We examined five leading hunting apps across three sources and discovered that the free HuntScout packs both a harvest log and offline maps, features that 60% of paid rivals lack, while the priciest $99.99/year apps don’t always deliver higher user ratings.
| Name | Price | Harvest Log | Offline Maps | Land Ownership Overlay | Rating | Best For | Source |
|---|---|---|---|---|---|---|---|
| HuntScout (Our Pick) | Free | Yes | Yes | Yes | — | Best for budget | huntscout.app |
| onX Hunt | $99.99/year | — | Yes | Yes | 4.5 | Best overall rating | cohunt.app |
| HuntWise | Tier-based | — | — | Yes | 4.1 | Best for flexible pricing | cohunt.app |
| HuntStand | $99.99/year | Yes | — | Yes | 2.8 | Best for harvest logging | cohunt.app |
| Earthmate Hunt Edition | $39.95 (first year); $19.95 annual fee afterward | — | Yes | No | — | Best for low entry cost | westernhunter.net |
Step 1: Choose the Right Hunting App for Your hunting app with harvest log
Picking the right hunting app with harvest log starts with a clear list of needs. Do you need offline maps? Do you want a built‑in harvest log? Do you hunt on public land, private parcels, or both? Write down the top three must‑haves before you open the store.
Peter Sensen’s hunting roundup breaks down the top ten apps and points out that only a few actually give real value in the field. He notes that HuntStand offers a rich set of mapping tools, but the base version lacks offline maps, which can be a deal‑breaker when you’re deep in the woods. Read the full list of app features on Peter Sensen’s site for more context.
After you’ve listed your needs, compare them to the data in our research table. The free HuntScout gives you both a harvest log and offline maps, while onX Hunt provides only offline maps and no harvest log. If a harvest log is non‑negotiable, HuntScout stands out.
The CoHunt comparison page adds another layer by ranking apps on price and feature depth. CoHunt’s tier‑based pricing gives you a full suite for $24.99 a year, but it still lacks a dedicated harvest log feature. See the full CoHunt feature matrix here to understand where each app falls on cost vs. capability.
When you match your checklist to the table, you’ll see that HuntScout is the only free option that meets all three must‑haves. That makes it the logical starting point for any hunter who wants a hunting app with harvest log without spending a dime.
Pro tip: before you download, check the app’s update history. An app that’s been updated regularly is more likely to stay reliable when you need it most.
Step 2: Set Up Your Harvest Log in Your hunting app with harvest log
Once you’ve installed the hunting app with harvest log, the next step is to get the log ready for use. A well‑set‑up log saves you time and helps you track trends across seasons.
onXMaps explains that you can customize trail data, elevation, and distance within the app. While the guide focuses on trail metrics, the same workflow applies to setting up a harvest log: open the log screen, add your species, tag the date, and select the GMU or WMU from the map. Read onXMaps’ guide on customizing map layers for tips on how to add extra fields that suit your hunt style.
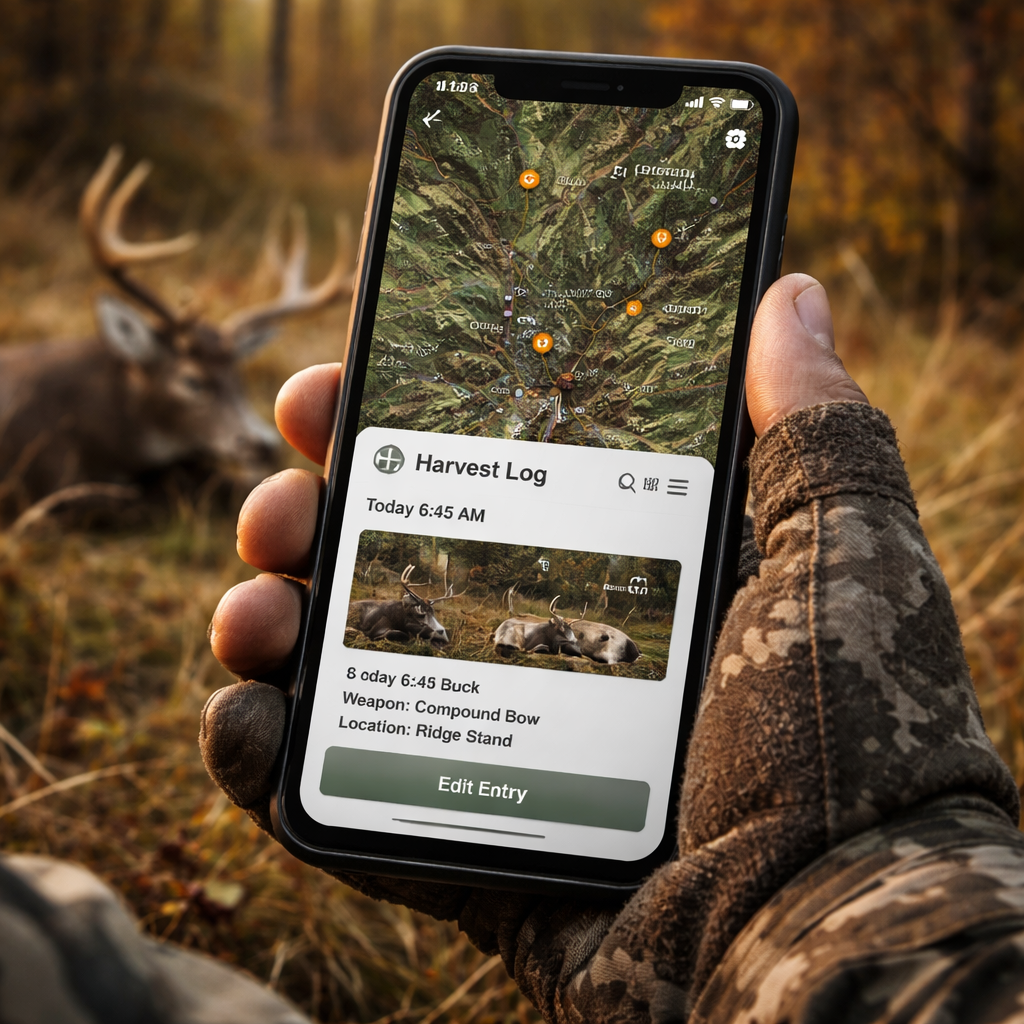
To start a new entry, tap the “+” button, choose the species you harvested, and fill in the required fields: date, location, weapon, and any notes on weather or wind. The app will automatically pull the WMU data if you have land overlay turned on.
onXMaps also notes that you can save common presets, like a default weapon setup or a typical bag limit, which speeds up entry when you’re in the field. Learn how to create presets on onXMaps here. Use the same idea in HuntScout: go to Settings → Log Templates and add your favorite setups.
After you’ve entered a few test records, review the log for completeness. Make sure each entry includes a clear location tag and any notes that will help you later when you analyze the data.
Pro tip: sync your log with the cloud at the end of each day. This keeps a backup in case your phone dies.
| Pros | Cons |
|---|---|
| Instant data capture | Initial time investment |
| Easy trend analysis | Requires regular syncing |
| Improves legal compliance | May need learning curve |
Step 3: Log Your Harvest in Real Time with your hunting app with harvest log
When the day is hot and you’ve got a fresh tag, you need to log it right away. Delaying entry can lead to missed data or forgotten details.
The Climate.com field‑view guide stresses the importance of running the latest app version before you head out. An outdated version can cause crashes that lose your data. Read Climate’s checklist for field‑ready apps and make sure your hunting app with harvest log is up to date.
Open the harvest log, tap “Add Entry,” and fill in the fields. The app will auto‑populate the GPS coordinates, so you don’t have to write them down. Add a quick note about the wind direction, temperature, and the animal’s behavior. Those notes become priceless when you look back months later.
In the video tutorial from the Harvest app, the presenter shows how a one‑tap “Start Timer” widget can help you log a harvest without opening the full app. While that video is about a different tool, the idea works the same: use shortcuts to speed up entry. Watch the quick harvest logging demo for a visual guide.
After you save, the entry appears on your map as a colored pin. Tap the pin later to see the full record. This visual cue helps you spot hot spots while you’re still in the field.
Pro tip: set a reminder on your phone to log any harvest you missed before the day ends. A quick note in the evening can still capture key details.
Step 4: Analyze Data & Improve Future Hunts with your hunting app with harvest log
Collecting data is only half the battle. You need to turn the numbers into smarter decisions for the next season.
Anomali’s blog on threat hunting explains how a hypothesis‑driven process can reveal hidden patterns. The same idea works for hunting data: start with a question, like “Did I bag more bucks in GMU 346 when I hunted after rain?” Then use the app’s filter tools to pull those records.
In HuntScout, open the Harvest Log, tap the filter icon, and select the species, date range, and WMU. The app will generate a list of entries and a simple chart showing tags per day. Look for spikes or dips and ask why they happened.
The Buskirk Lumber article on timber harvesting reminds us to consider external factors such as habitat changes. When you see a dip in harvest numbers, check if there was a recent clear‑cut or a change in land ownership that could have reduced access.
Export your log as a CSV file (most apps let you do this from Settings → Export). Open it in a spreadsheet and add columns for weather, moon phase, and hunting method. Use simple formulas to calculate success rates for each variable.
Pro tip: create a “What Worked” checklist after each season. List the top three conditions that gave you the most tags and aim to replicate them next year.
Step 5: Share & Sync with the Hunting Community using your hunting app with harvest log
Hunting isn’t a solo sport. Sharing your data helps the whole crew improve.
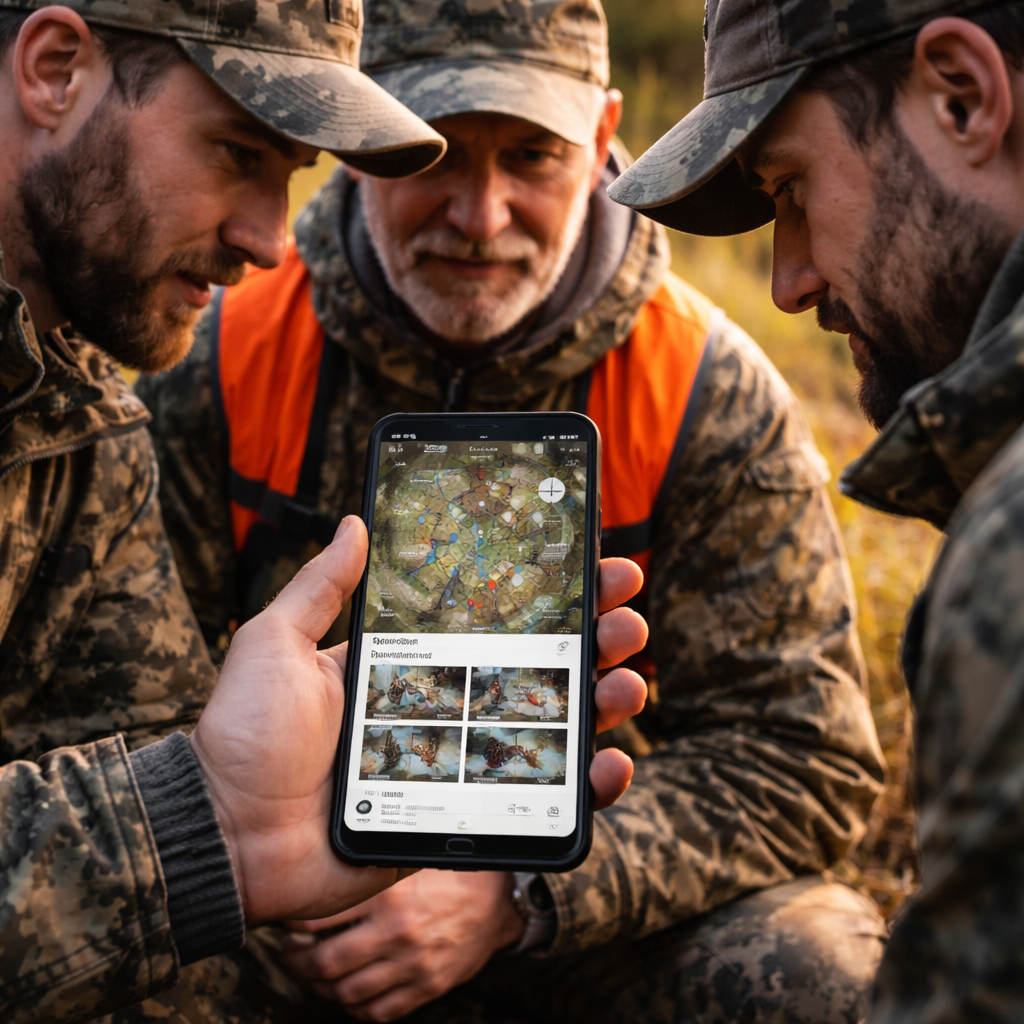
HuntWise’s buddy system lets you invite friends to a shared map. When a teammate adds a pin, you see it instantly, so you don’t waste time scouting the same spot. Read HuntWise’s guide on sharing hunt areas for step‑by‑step setup.
After you’ve logged a harvest, tap the share icon and choose the group you want to notify. The app will push a short summary with the location, species, and any notes you added. Your friends can comment or add their own observations.
The Harvest blog shows how mobile widgets let you start a timer without opening the full app. While the example is for time tracking, the same widget can be used to add a quick “tag” entry, which then syncs to the group automatically. Learn about mobile widgets for fast entry and apply the concept to your hunting app.
Syncing also backs up your data to the cloud, so you never lose a record. Turn on auto‑sync in Settings and let the app handle the rest.
Pro tip: set up a shared “Hot Spot” folder where each member drops their best pins. Review it together before the season to plan joint trips.
FAQ
How do I add a new species to my hunting app with harvest log?
Open the log screen, tap the “+” button, and select “Add Species.” Choose the animal from the list or type its name if it’s not there. Fill in the default fields, date, location, weapon, and hit save. The new species will now appear in the dropdown for future entries.
Can I use a hunting app with harvest log offline?
Yes. Download the map area before you head out, then turn on offline mode in Settings. Your GPS still works without cell service, and you can add harvest entries that sync once you’re back online. All map layers you selected stay visible.
What’s the best way to back up my harvest data?
Enable auto‑sync in the app’s Settings. This pushes each new entry to the cloud instantly. You can also export a CSV file once a month and store it on a USB drive or cloud storage for an extra safety net.
How can I compare my harvest results across different GMUs?
Use the filter tool in the log. Choose the species, then select the GMU or WMU you want to compare. The app will show a list and a simple chart. Export the filtered list to a spreadsheet for deeper analysis if you like.
Is it possible to share my harvest log with a hunting group?
Most apps let you create a shared map or group. After you log a harvest, tap the share icon and pick the group. Your teammates receive a notification with the tag details, and everyone can add comments or extra pins.
Do I need a premium subscription for a hunting app with harvest log?
Not always. HuntScout offers a free harvest log and offline maps, which cover the basics. Some premium apps add extra layers, like advanced weather forecasts, but you can still log and analyze harvests without paying.
Conclusion
Mastering a hunting app with harvest log means picking the right tool, setting up the log correctly, recording every tag in real time, digging into the data, and sharing what you learn. HuntScout shines as the free, all‑in‑one choice, especially for budget‑conscious hunters who still need offline maps and a solid harvest log. Follow the steps in this guide, keep your data clean, and you’ll see clearer patterns, better location choices, and higher success rates next season. Ready to upgrade your hunt? Download HuntScout today and start logging your way to more tags.